With the podcasting revolution in full swing, many content creators are jumping on the bandwagon to share their voices with the world. But, to produce high-quality content, you need more than just a captivating script and a great personality. The key to a successful podcast lies in setting up the perfect podcasting space in your home office. In this blog post, we will guide you through the process of creating an ideal setup that ensures top-notch audio quality and enhances your overall podcasting experience.
Step 1: Choosing the Right Location
Selecting the right location for your podcasting space is crucial. Look for a quiet and relatively small room that can be easily soundproofed. If you're unable to dedicate an entire room, consider using a closet or building a DIY vocal booth to minimize external noises and maximize sound absorption.
Step 2: Soundproofing
To ensure crystal-clear audio, consider investing in soundproofing materials. We Sell Mats offers foam floor tiles in faux wood patterns that will soften the acoustics of your podcasting space without sacrificing style. We are pleased to offer a variety of textures, patterns and thicknesses, plus free samples so you can determine which foam floor tile will best suit your needs. Acoustic foam panels, bass traps, and sound diffusers can be used on the walls or ceiling to minimize sound reflections and dampen background noise. Remember, a quiet space with minimal external interference allows your listeners to focus on your content without any distractions.
Step 3: High-Quality Microphone and Headphones
Your microphone is the heart of your podcasting setup. Choose a high-quality microphone that matches your voice and recording style. Dynamic microphones are excellent for reducing background noise, while condenser microphones capture more nuances in your voice. Pair your microphone with a good set of studio headphones to monitor your recording and detect any issues in real-time.
Step 4: Audio Interface and Recording Software
An audio interface connects your microphone to your computer and ensures optimal sound quality. Select an interface that suits your microphone's connectivity (USB or XLR). Pair it with reliable recording software like Audacity, Adobe Audition, or GarageBand, which provides advanced editing features to polish your recordings.
Step 5: Pop Filters and Shock Mounts
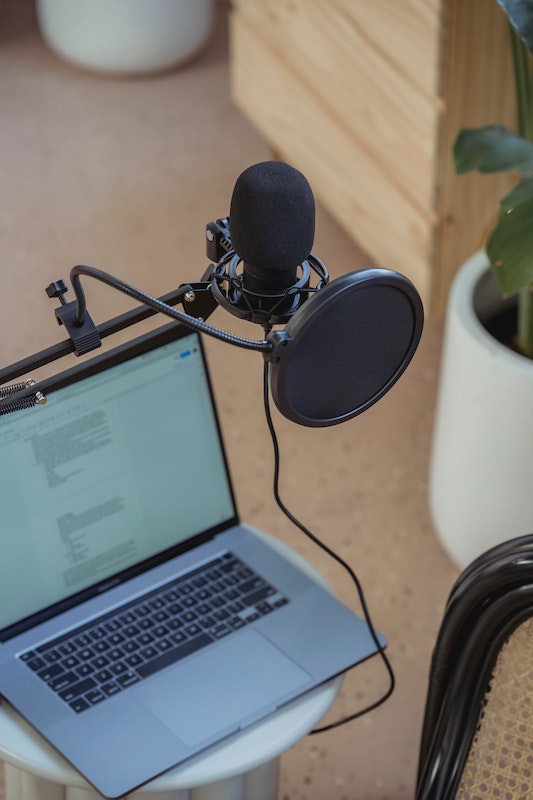
Pop filters help prevent popping sounds caused by strong puffs of air hitting the microphone. Shock mounts isolate the microphone from vibrations, reducing unwanted noise caused by desk movements or footsteps. Investing in these accessories enhances the overall quality of your recordings.
Step 6: Comfortable Furniture and Ergonomic Setup
Recording a podcast can take time, so comfort is crucial. Invest in an ergonomic chair and a well-designed desk to maintain good posture during extended recording sessions. Arrange your equipment in an organized manner for easy access and a clutter-free workspace.
Step 7: Test and Optimize
Once your podcasting space is set up, don't forget to test your equipment and make necessary adjustments. Record some sample episodes, listen back critically, and fine-tune the settings to achieve the best possible sound quality.
Creating the perfect podcasting space in your home office is not just about fancy equipment; it's about optimizing your environment to bring out the best in your content. With the right location, equipment, and set-up, you'll be well on your way to delivering exceptional podcast episodes that captivate your audience and keep them coming back for more. Happy podcasting!


